How to 3D Print Tiny Objects Successfully

My daughter received a set of Kirby hanging figurines as a gift. Each figure was posed in a flying position, using a small, clear plastic hook. The hook was a simple friction fit, so it was only a matter of time before one of those tiny plastic bits went missing.
Sure enough, one figurine was left stranded without its hook. The set was incomplete, and my daughter was disappointed. But this was exactly the kind of problem a 3D printer was made to solve.
Here’s the process I used to design and print a replacement hook, and the key settings you need to know when printing small, precise parts.
Designing the part
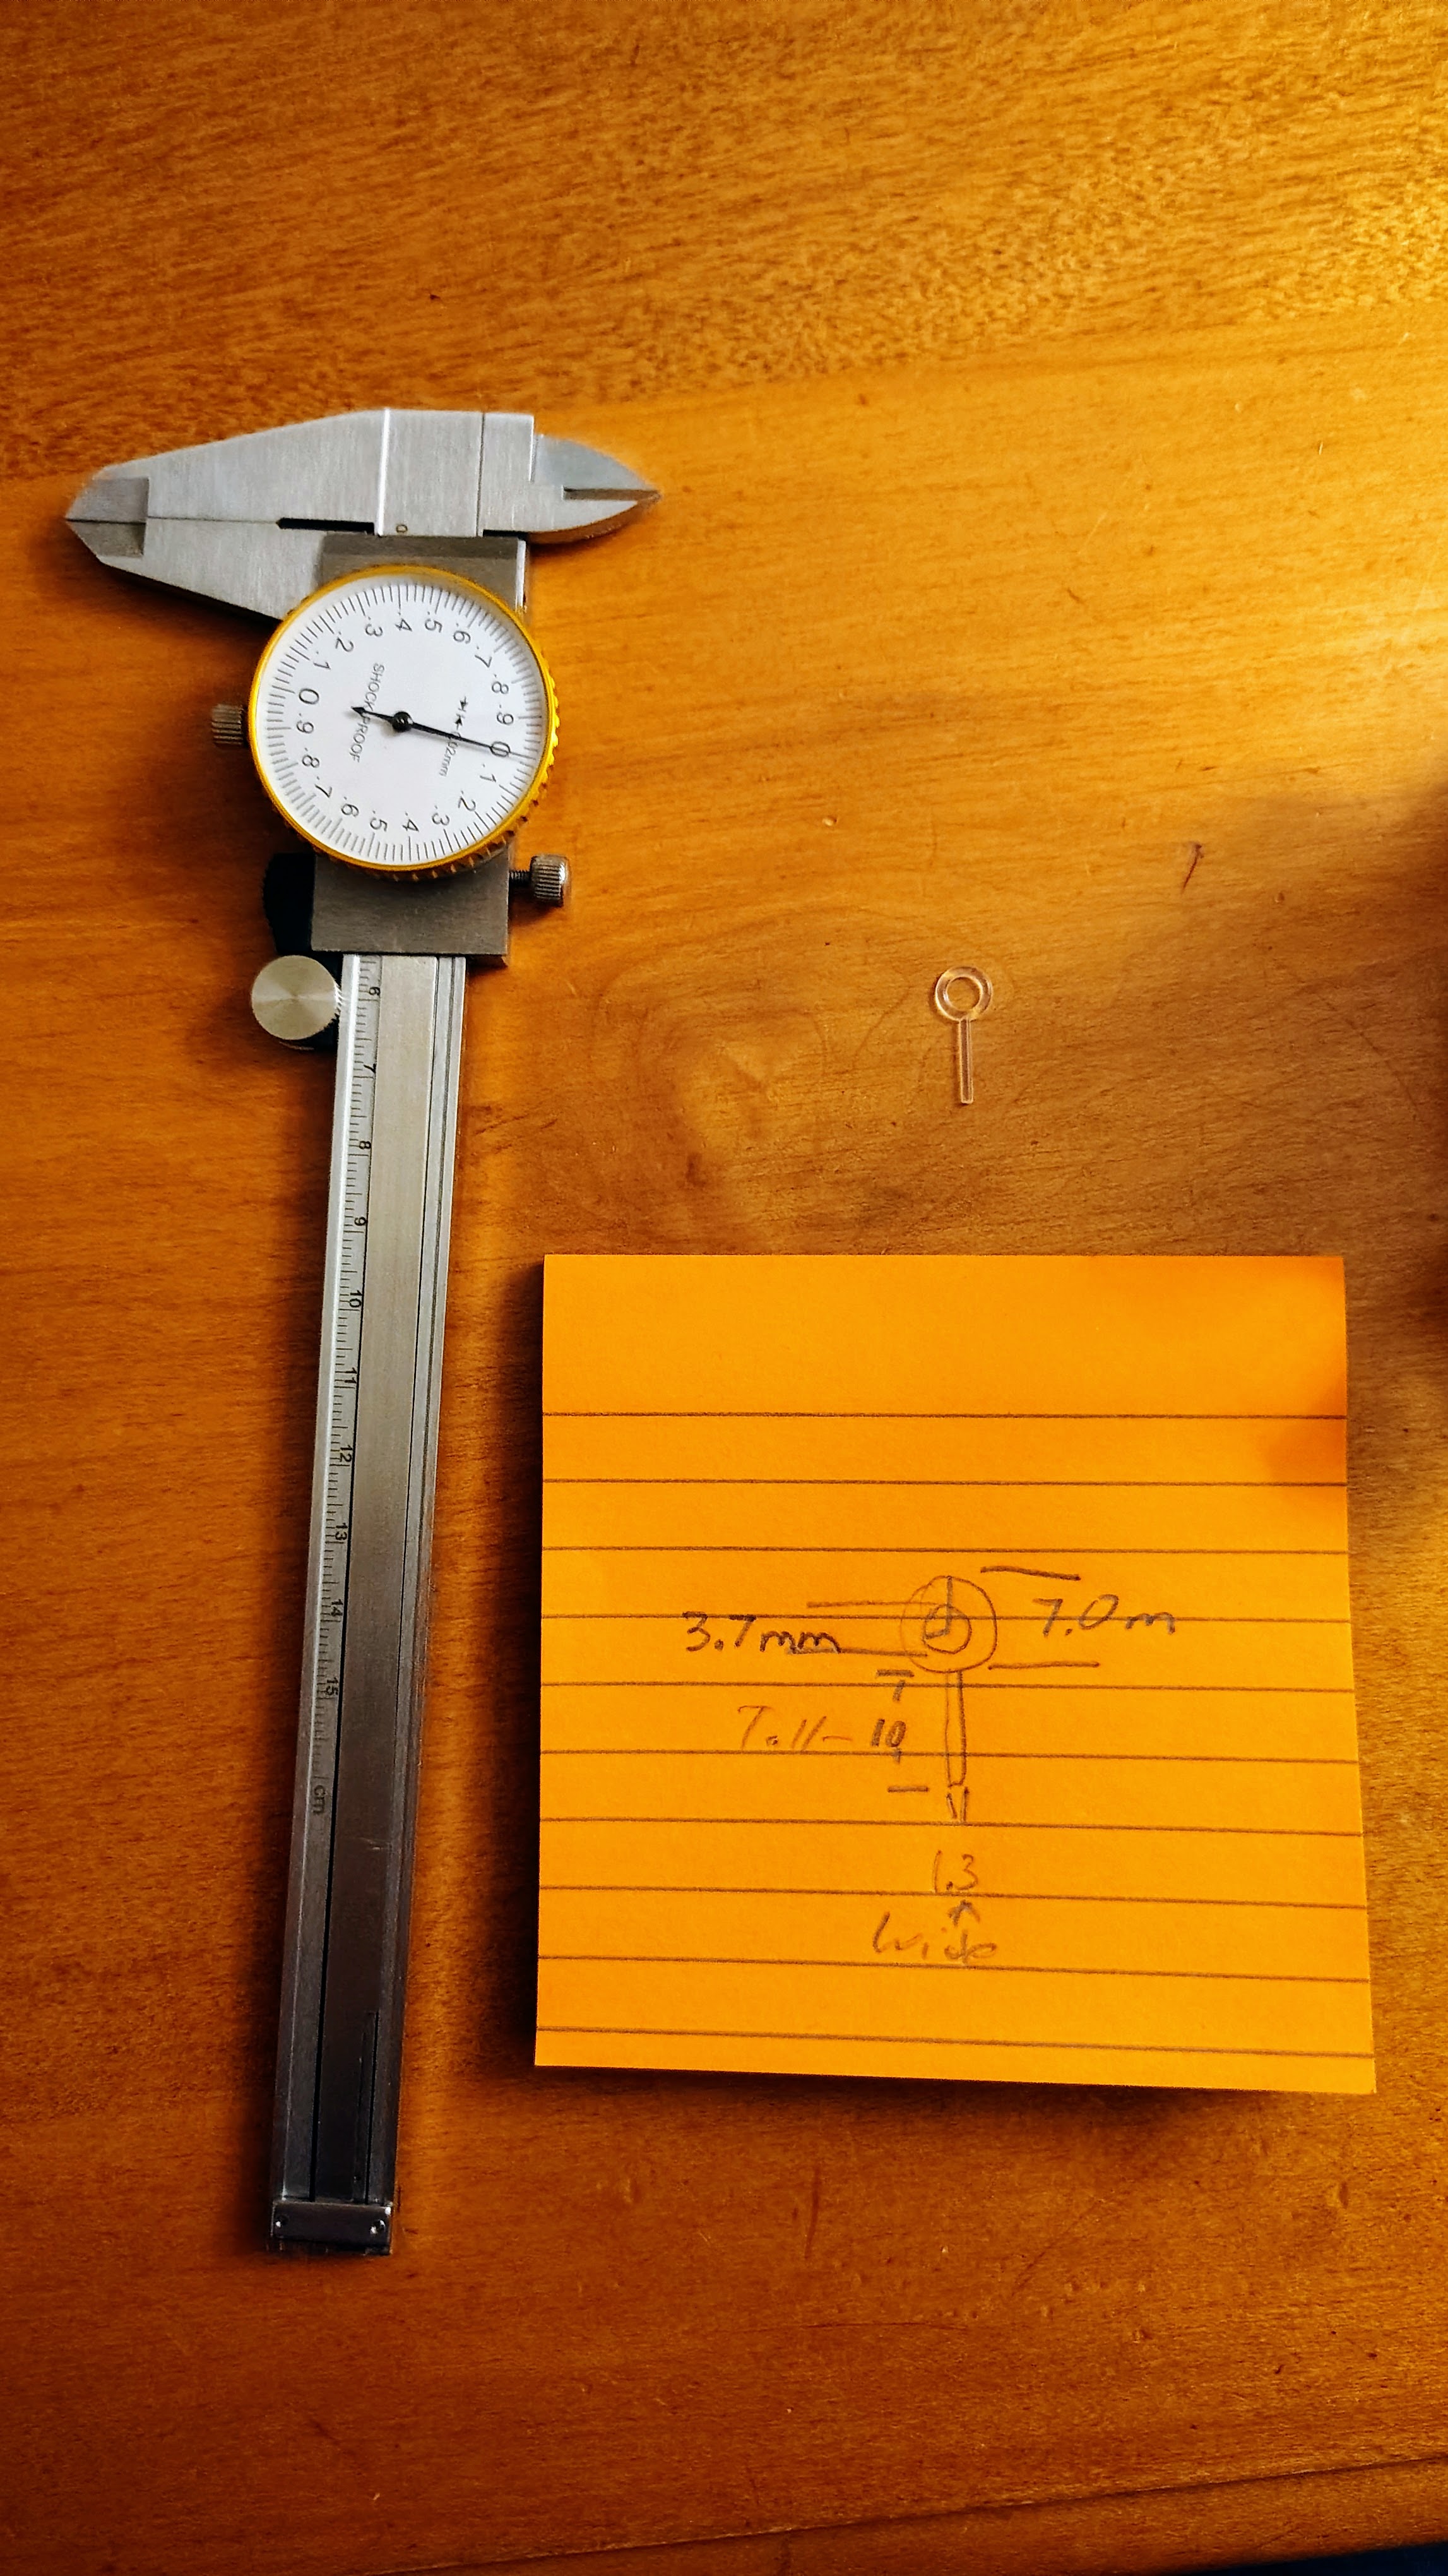
The first step was getting accurate measurements of a similar hook. I used calipers to measure:
- Inner diameter of the loop: 3.7mm
- Overall length: 7.0mm
- Thickness of the hook material
For a simple shape like this hook, Tinkercad is perfect. The design consisted of just two shapes:
- A cylinder for the hanging stem
- A torus (donut shape) for the loop at the top
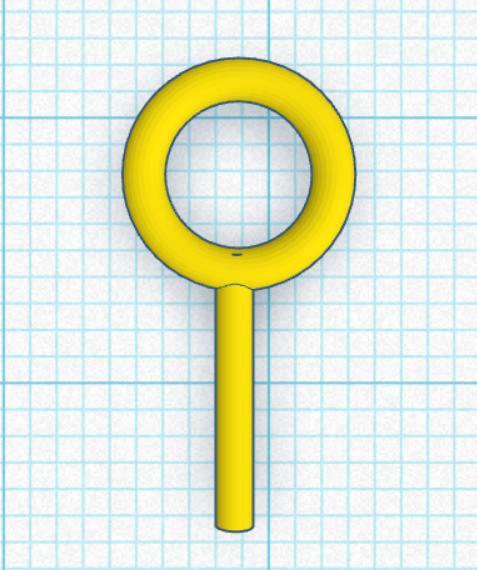
This took maybe 20 seconds to model.
Export as STL and then we head to the slicer.
Step 3: Critical Slicer Settings
This is where printing tiny objects gets tricky. Your default print settings won’t work well for small, precise parts. Here are the two most important settings to change in Bambu Studio:
Layer Height: The Resolution of Your Print
3D printers are pretty accurate, but they’re limited by resolution - essentially the “pixel size” of your print. This is primarily determined by layer height.
For tiny parts that need to be extremely precise dimensionally accurate, I used the 0.08mm Extra Fine profile. This setting automatically adjusts many things about how your printer handles filament flow to achieve very small layers. This effectively reduces the “pixel size” of your print.
For a rod that needs to fit through a specific hole on a toy to acheive a friction fit, that extra precision matters. The added bonus of small layer height are nearly invisible layer lines. For high quality pieces that you don’t want clear layer lines with, you may want to consider smaller layer heights.
.08mm thick layers is possible overkill for this job, it’s possible .12mm would have been fine. If you ever need to get to even smaller layers, you can get a .2 nozzle, which allows you to get down to .04.
Smaller layers increase print time, and they do not increase strength.
Brim: Winning the Bed Adhesion Battle
One of the constant challenges in 3D printing is bed adhesion - keeping your part stuck to the build plate while it prints. Small, light parts are especially prone to coming loose and flying off the bed, ruining your print.
One solution is a brim. A brim is sacrificial material printed around the base of your part. It increases the surface area touching the bed, giving much better adhesion. When the print is done, you simply snap it off.
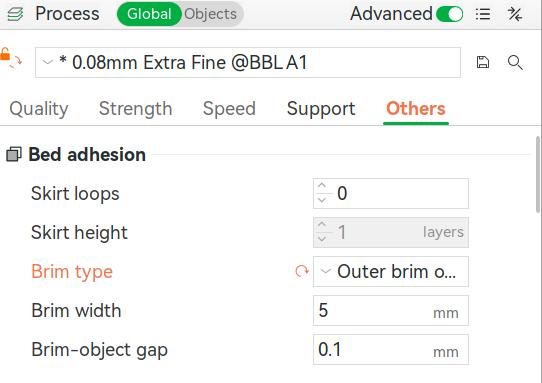
In Bambu Studio, you need to enable this manually:
- Go to the Others tab in the process settings
- Find Brim type
- Set it to “Outer brim only”
- Adjust the brim width (I used default)
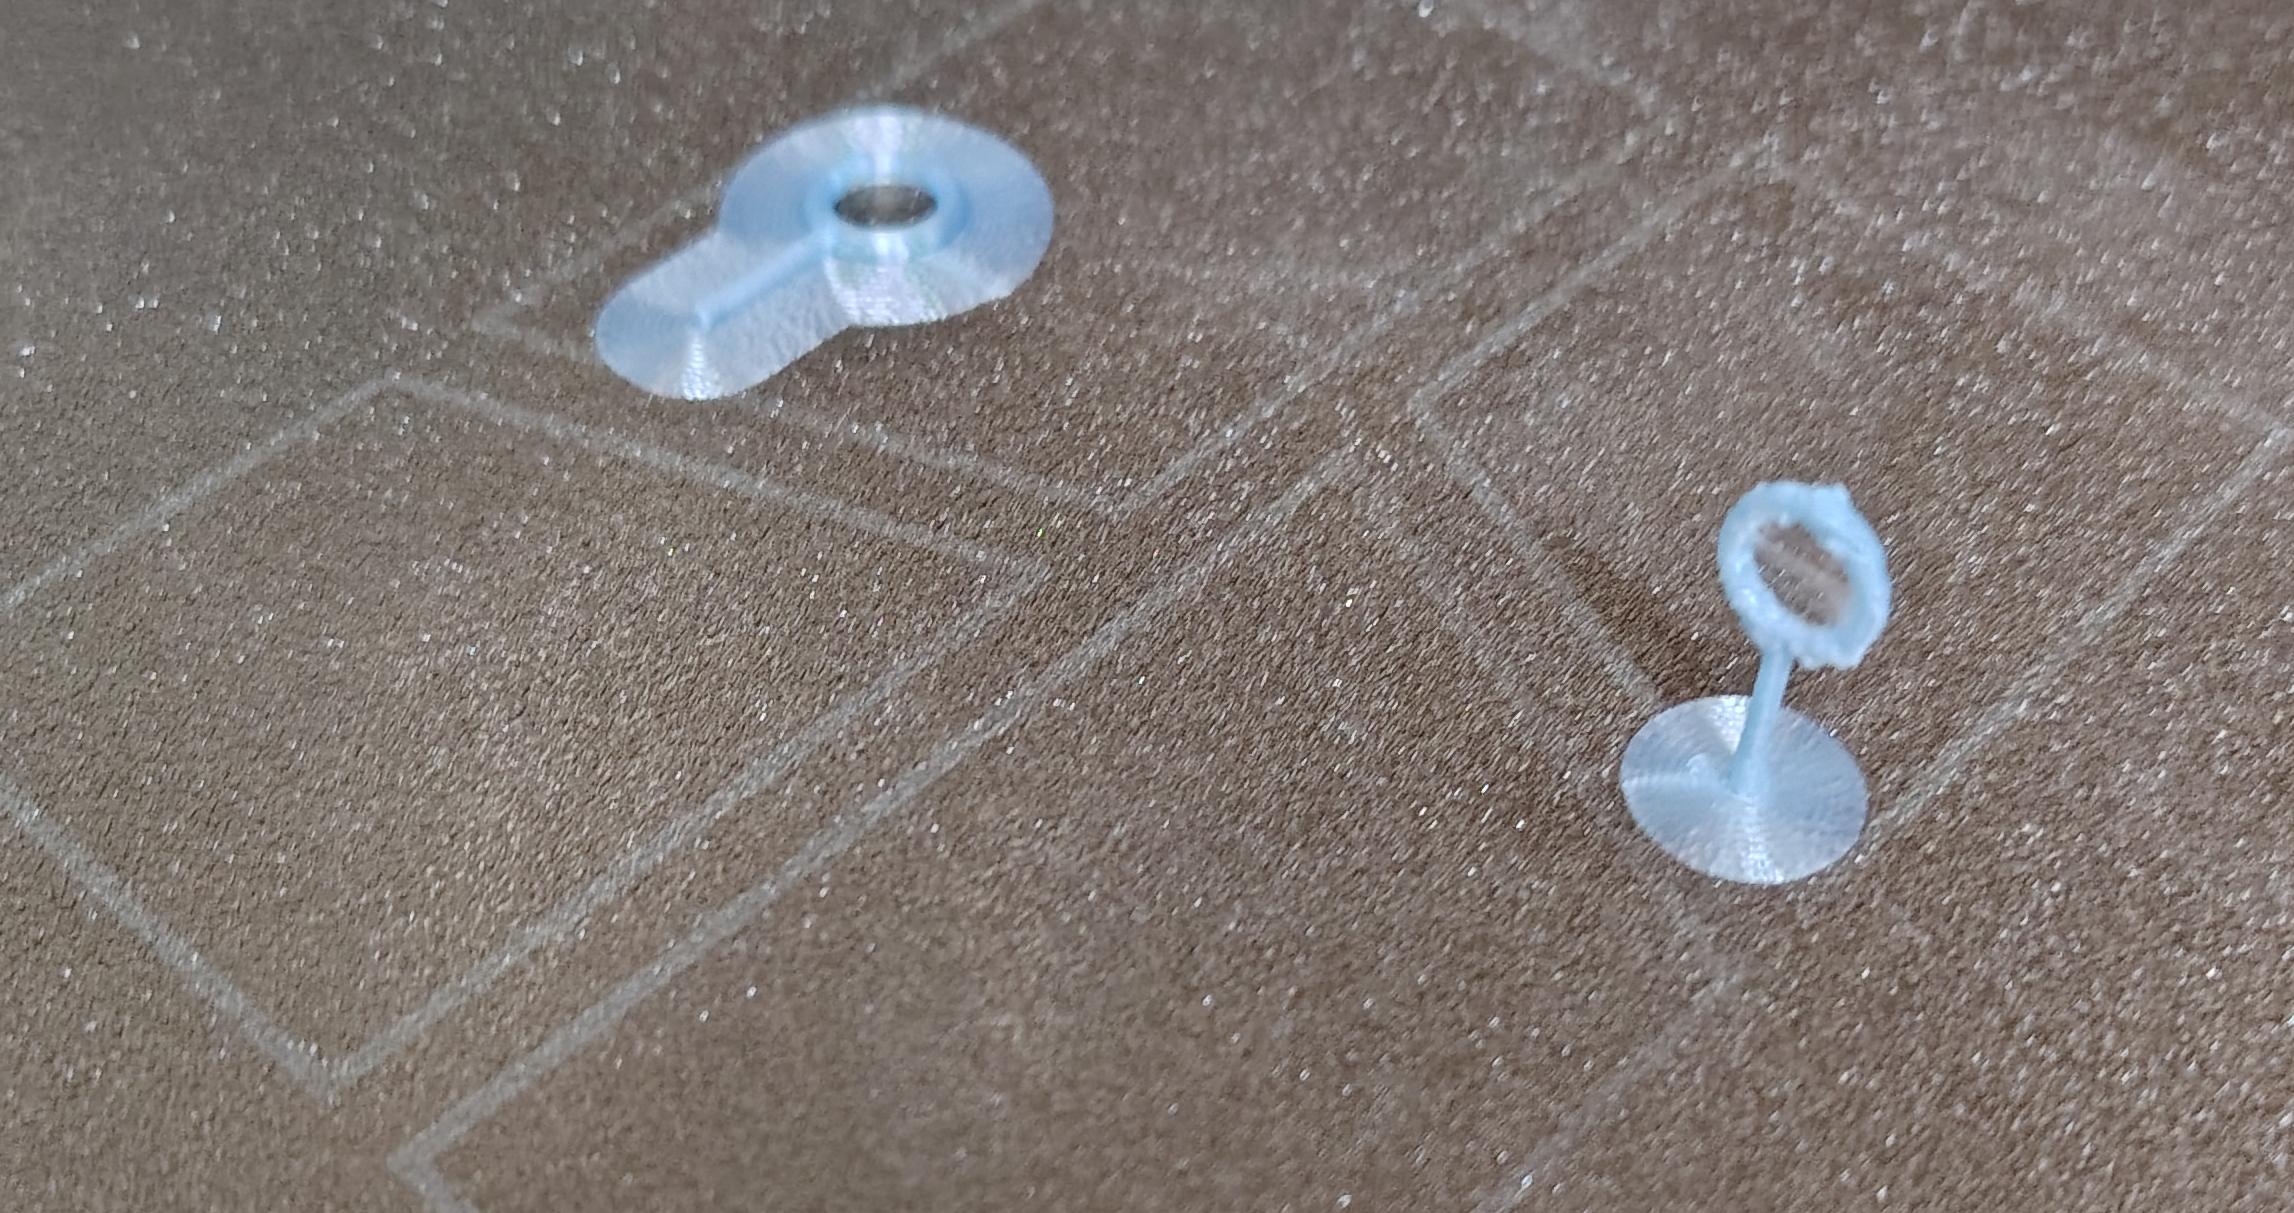
Without a brim, my tiny hook would have been knocked loose by the nozzle within the first few layers. With a brim, it stayed firmly attached throughout the entire print. I printed the object standing on its end to show you how well it can make even tiny objects adhere to surfaces, although the material seems to be more prone to wisping at small layer heights.
Bed Adhesion is a tricky topic that I will cover later - brims are great tools, but they are often a last resort.
Step 4: Print and Test
With the right settings configured:
- 0.08mm layer height for precision
- Brim enabled for bed adhesion
- PLA filament (easy to work with for small parts)
The print took maybe 10 minutes. Here’s what came off the printer:
The brim snapped off cleanly, leaving a perfect little hook.