Embedding Magnets into Your 3D Prints
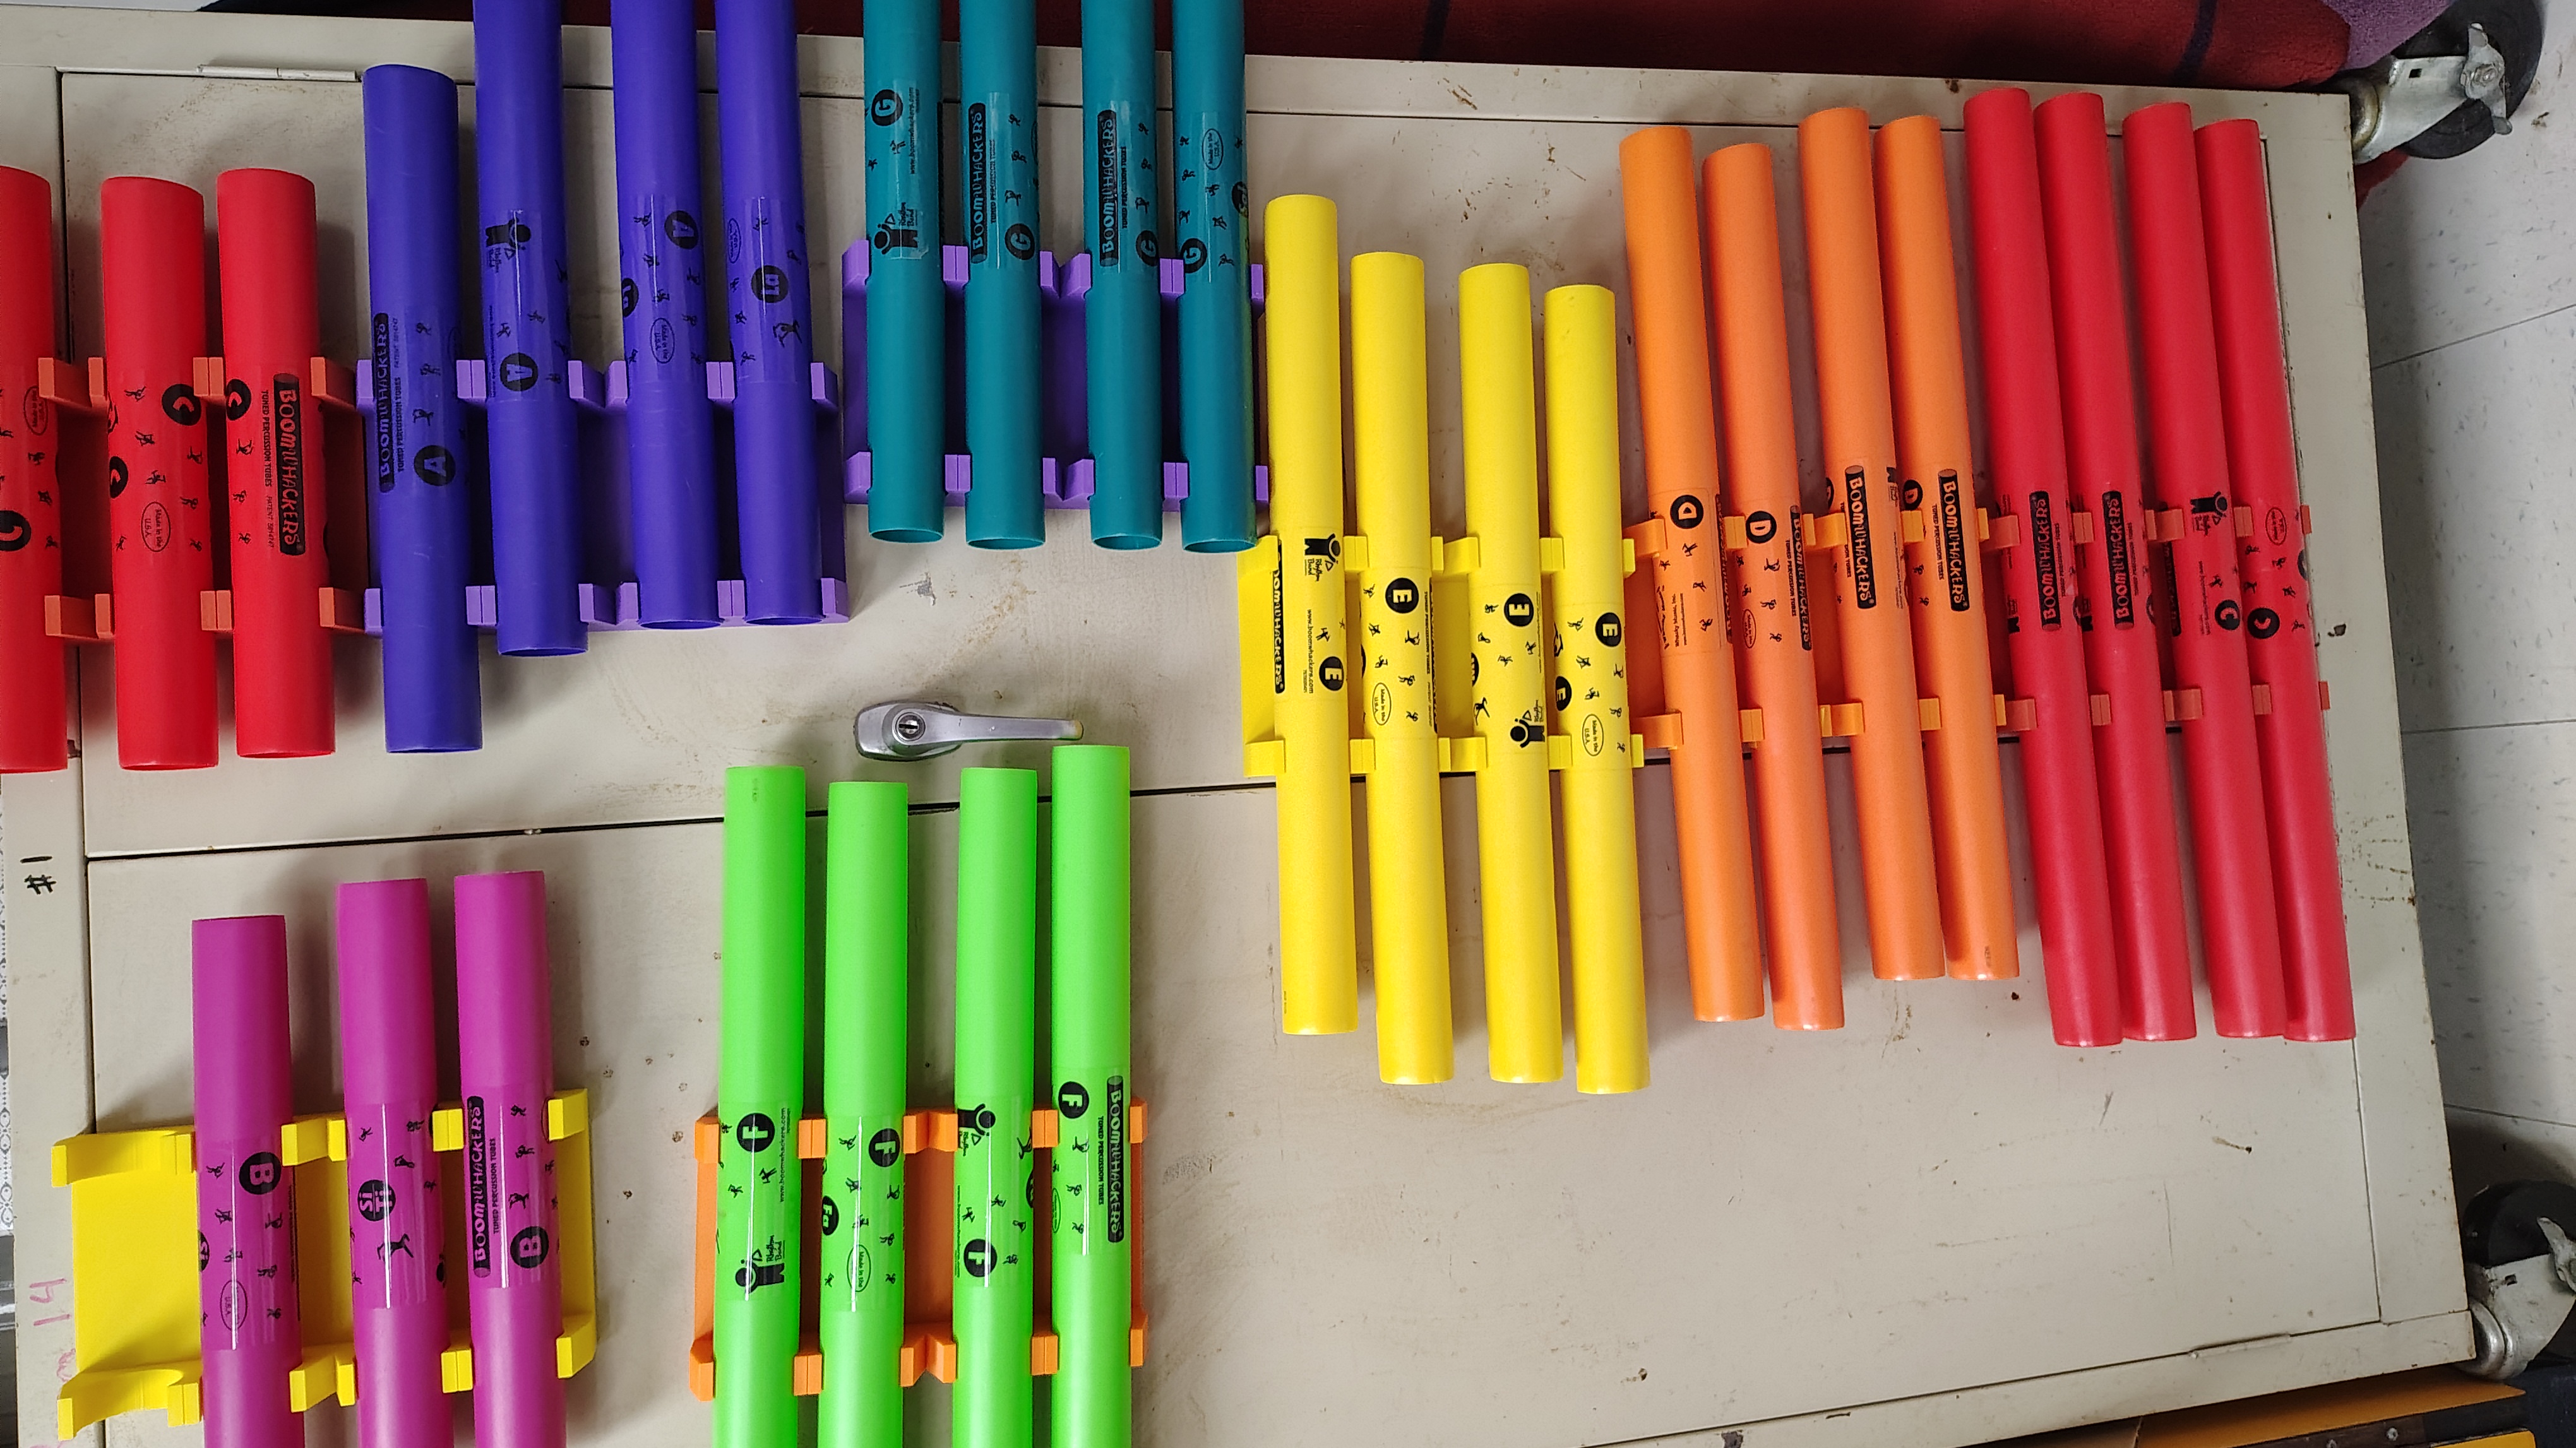
I have a recurring problem in my music classroom: I need student-accessible storage for instrumens, especially my boomwhackers. There are commercial products for this, but I don’t have money to waste when I can use my 3D printer to stretch my budget instead. Plus, I wanted to create a custom solution using an old metal cabinet I already have in the room.
My design incorperates embedding magnets directly into the 3D printed mount. Here’s how I designed and printed magnetic boomwhacker holders using negative spaces and print pauses.
Bonus: With a little tape on the inside of each mount, these holders can secure the boomwhackers firmly enough to turn them into mounted xylophones.
Materials You’ll Need
- Rectangular neodymium magnets - I used 60x10x3mm magnets (~$0.50 each on Amazon)
Cost per mount: Approximately $4 total ($2 for magnets + $2 for 117g of PLA)
Step 1: Design Your Base Model
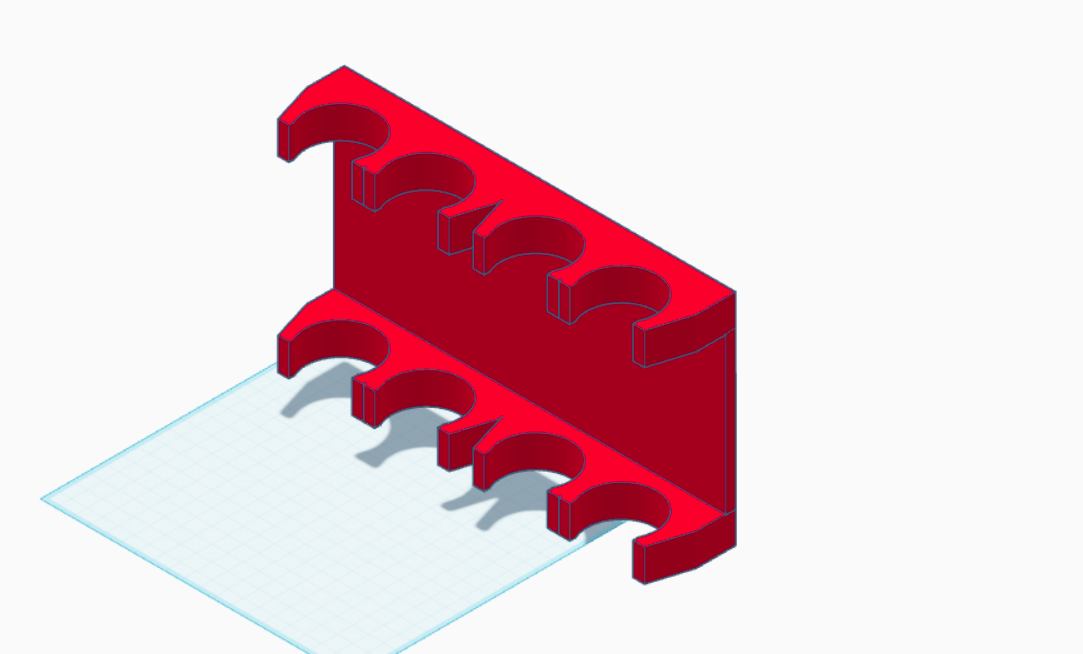
I started by pulling out my calipers and measuring the general dimensions I would need for the boomwhacker holders. Using Tinkercad, I created a fairly simple base model with curved holders for the boomwhackers.
The initial design focused on functionality - getting the right spacing and curve for the boomwhackers to rest securely. After a few test prints I was ready to move to the slicer, where we will embed magnets into the print.
Step 2: Create the Negative Space for Magnets
This is where the magic happens. To embed magnets into your print, you need to create a negative space (a hole) that the magnet will fit into. You can do this in TinkerCAD, and there are times where this is the best way to do it, but doing it in slicer (Bambu Studio for me) is generally the best approach. This way you can experiment with the positioning and resize the object without needing to remake the negative space.

In Bambu Studio:
- Add a negative part (the “hole” shape)
- Select cube shape

The default cube is 20x20x20mm, so we need to resize it to match our magnets. Use the scale tool with only the negative space selected (you may need to use the object viewer tree on the left side).
Resize to Match Your Magnets

Important: Uncheck “uniform scale” so you can control the X, Y, and Z dimensions independently.
I initially planned to use 30x10x3mm magnets, so I adjusted the dimensions accordingly:
- X: 30mm (length)
- Y: 10mm (width)
- Z: 3mm (height)
Later in the process, I decided to switch to longer 60x10x3mm magnets for better hold, so I simply updated the X dimension to 60mm.
Step 3: Position the Negative Space (The Critical Part)
Your negative space is currently floating in the middle of nothing. We need to position it precisely so the magnet sits at the right depth in your print.

Understanding Coordinates: Object vs. World
This is crucial to understand:
- Object Coordinates: Measure distance from the center of the object itself. These values change depending on the size of the object.
- World Coordinates: Measure relative to the build plate. These values are absolute.
For the Z coordinate (height), use World Coordinates to get consistent, predictable placement.
Calculate the Correct Z Height
Here’s where layer height math comes in. My goal was to have only a single layer of PLA containing the magnet on the bottom (this is more than sufficient strength-wise).
The calculation:
- My magnets are 3mm high
- My layer height is 0.2mm
- 3mm ÷ 0.2mm = 15 layers for the magnet height
- I want one layer below the magnet: 1 layer
- I want one layer above the magnet: 1 layer
- Total: 17 layers × 0.2mm = 3.4mm from the build plate
Therefore, I set the World Coordinate Z position to 1.8mm
This means:
- 0.0 - 0.2mm = First layer (below magnet)
- 0.2 - 3.2mm = Magnet space (15 layers)
- 3.2 - 3.4mm = Top layer (above magnet, layer 17)
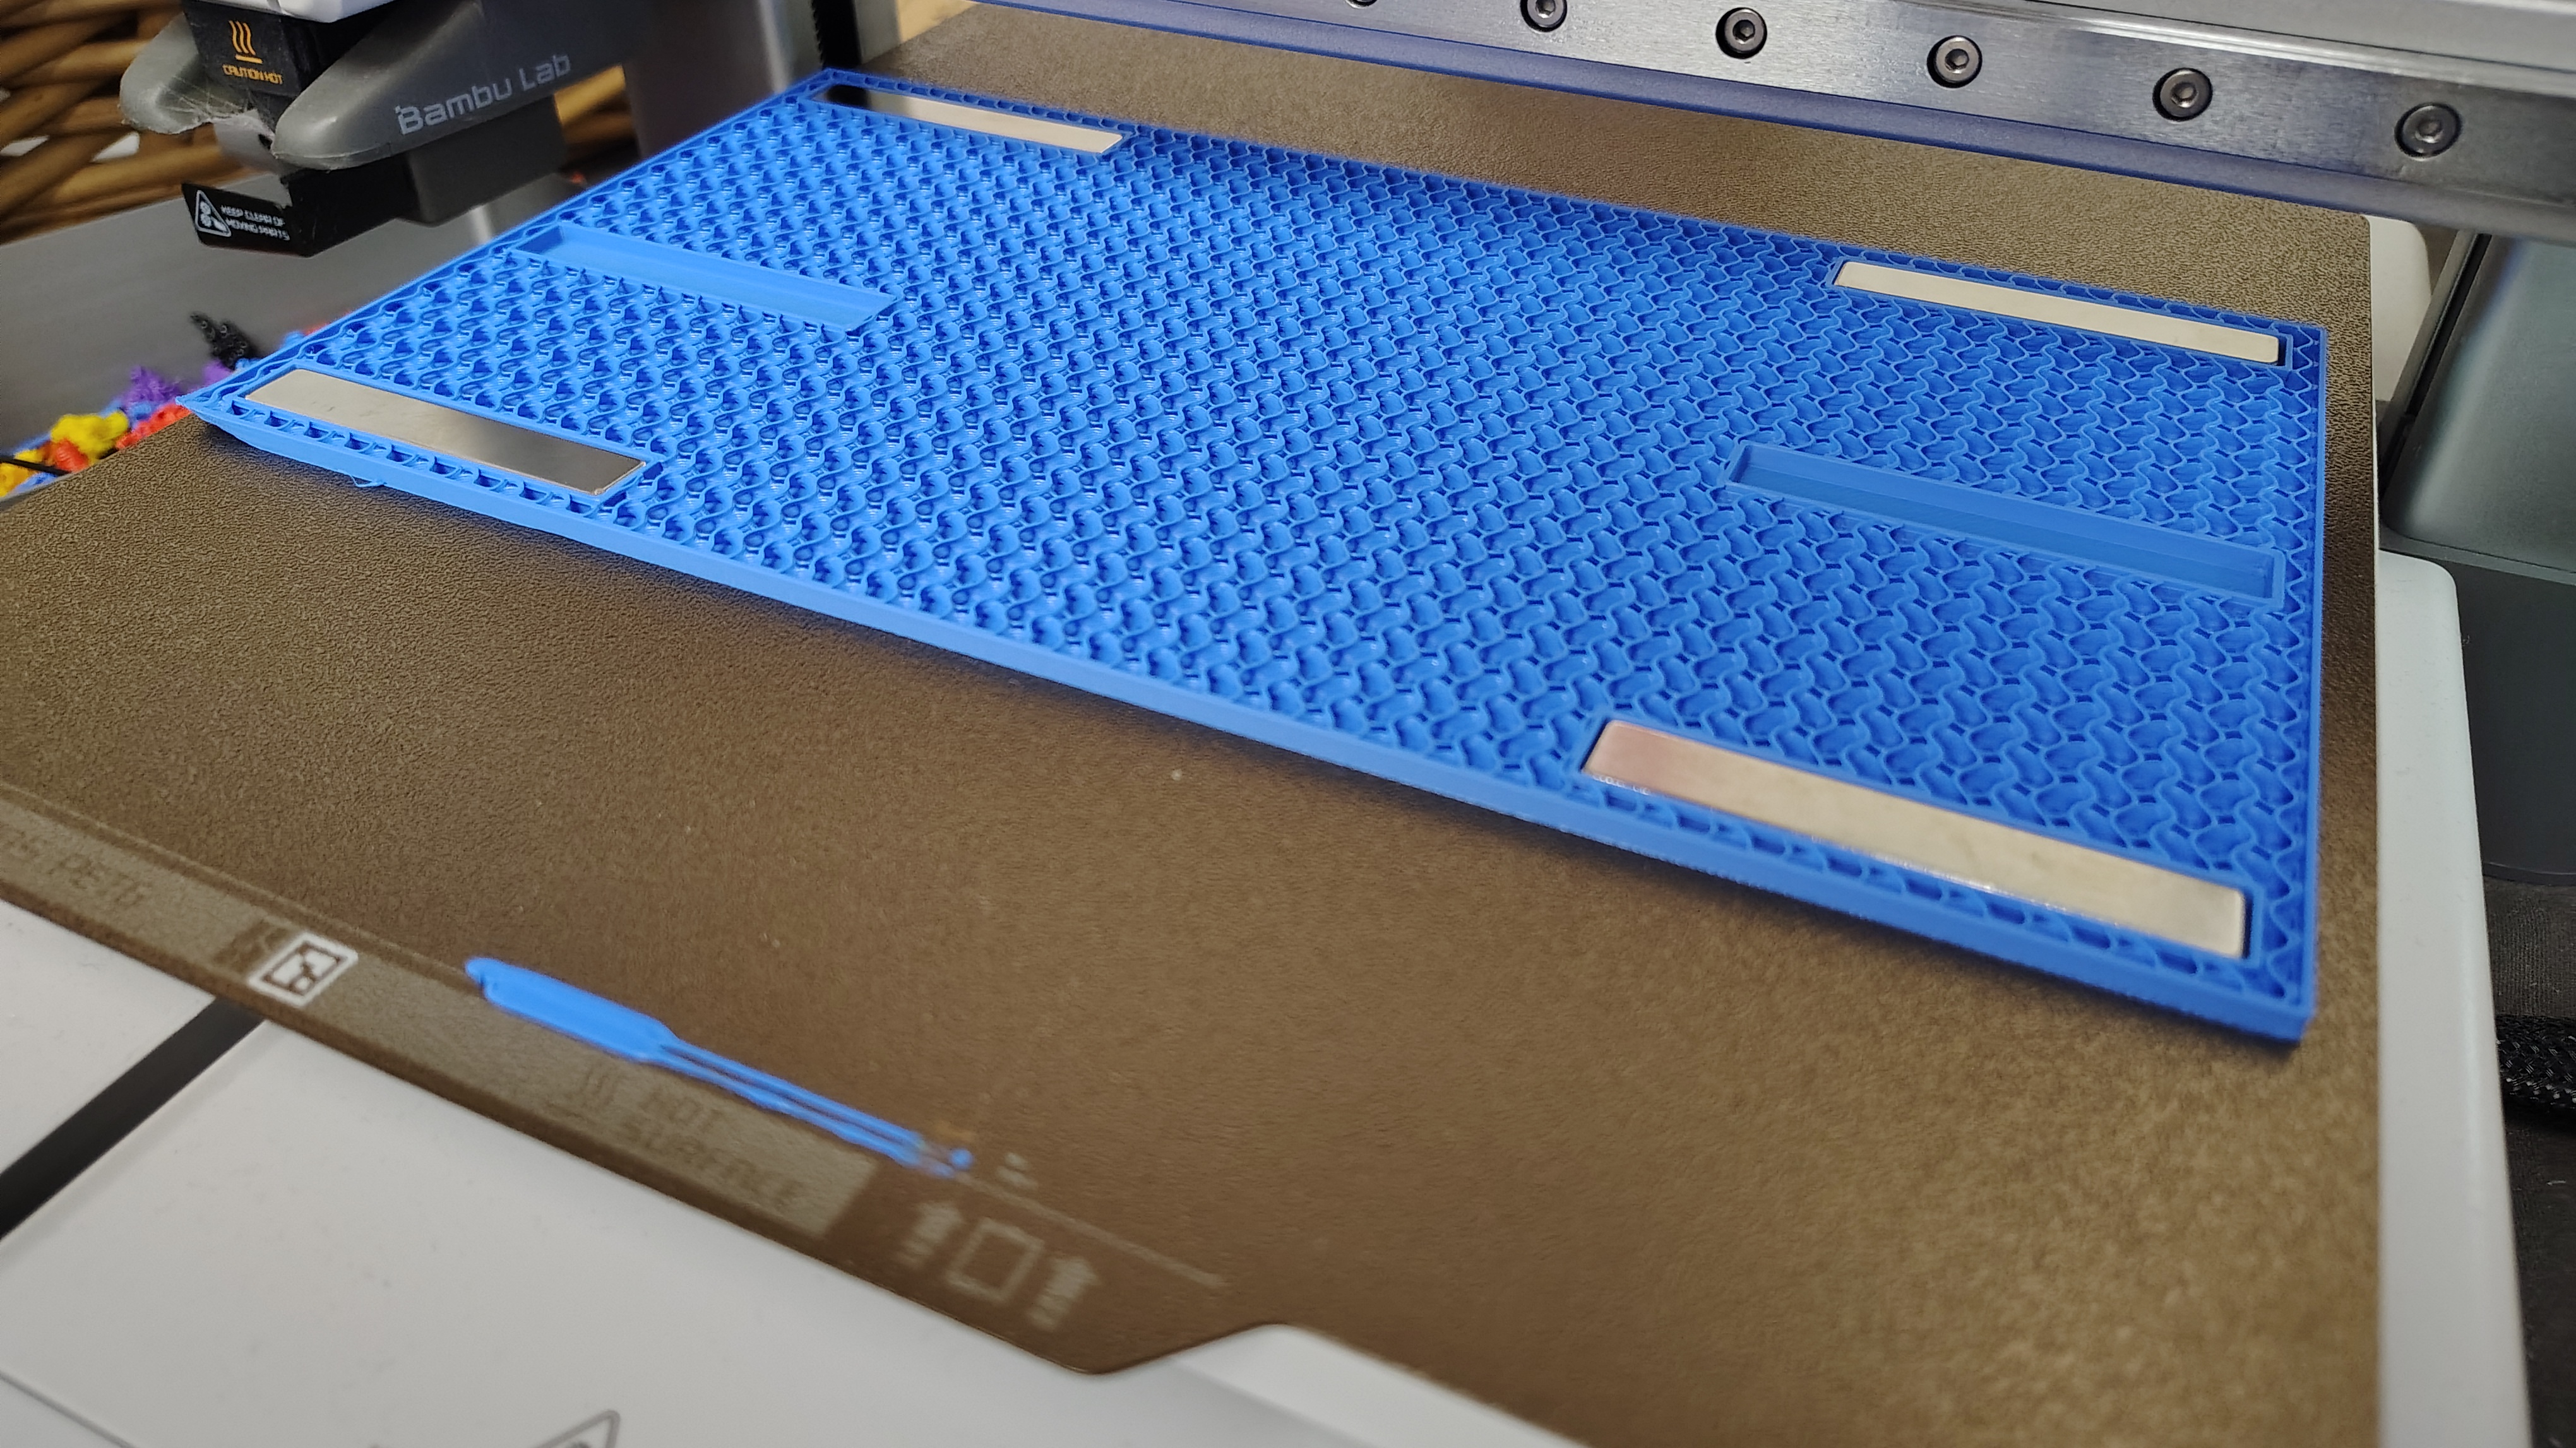
Step 4: Slice and Add a Print Pause

Now let’s go to Preview and select the layer bug on the right side. You can drag it up and down to select a layer. You can see the outline of our magnet on the very first layer. Now we need to tell the printer exactly when to pause so you can insert the magnets.


- Open the preview in your slicer
- Move the layer slider up until you reach layer 17 (or whatever layer number you calculated)
- Verify by going up one layer - you should see the layer that attempts to bridge across the top of the magnet pocket
- Add a pause at layer 17 by right-clicking the layer select bug
I usually do this step before adding in all of the other negative spaces (as the copied object’s Z dimension should be the same). Remember that you can only interact with the negative space in the PREPARE tab.

Bambu Studio and most slicers have an “Add Pause” or “Insert Pause” option when you right-click on the layer preview.
Step 5: Duplicate Negative Spaces Efficiently
Rather than manually placing each magnet pocket, there’s a much faster way using Bambu Studio’s object system.

- Select your already lined up negative space (you may need to use the object viewer and click the object)
- Ctrl+C and Ctrl+V three times to create four total negative spaces, all stacked at the same x, y and z coordinate
- Adjust the position of each new negative space by clicking the negative space object in the object viewer, then move using Object Coordinates
- Since coordinates are relative to the midpoint, simply change the signs of X and Y coordinates to get all combinations:
- (++): positive X, positive Y
- (+-): positive X, negative Y
- (–): negative X, negative Y
- (-+): negative X, positive Y
This creates perfectly spaced negative spaces without manual movement.

Step 6: Print and Insert Magnets
Send the print to your printer and wait for the pause.
When the printer pauses:
- Carefully insert your magnets into each negative space
- CRITICAL: Make sure all magnets have the same polarity - test with another magnet before inserting to ensure they all attract on the same side. Although functionally it will work, I always make sure insert my magnets the same way, in case if I have an idea later to attach something to that magnet. Most of my prints on this website rely on having the correct polarity.
- Resume the print
The printer will continue and lay down the 18th layer over the magnets, sealing them inside the print.
This step is safe, but I’d recommend sticking around to watch it the first few times. If your negative space isn’t very close to the build plate, you may encounter an issue where the magnet attaches to your nozzle as it is trying to bridge the space. This obviously is a critical failure that requires instant attention.
Results
The finished boomwhacker mount attaches securely to my metal cabinet and provides both storage and display for easy access during class. The magnets are completely embedded and create a strong, reliable hold. A little bit of floor tape on the insides of the mount turns these into a custom, four-note xylophone.
Tips and Troubleshooting
- Magnet thickness: If you use different thickness magnets, recalculate the Z position based on your layer height.
- Test fit: If your magnets are too tight, add 0.2mm to some or all dimensions of your negative space.
- Polarity marking: Mark one side of your magnets with a Sharpie before inserting so you don’t mix them up.
- Print orientation: Although not a requirement, the bottom face is always the most secure to contain magnets.
- Removing magnets: If your print is thin and easy to break, you can just use a firm grip and a pair of pliers to destroy the print and peel off the bottom layer. On larger items, like this project, a heat gun or hair dryer applied to the area will make it pliable, allowing you to tear it out.